Documentation
Installation
1. Download the Plugin
Get the latest ZIP file from the latest release
2. Go to your WordPress dashboard
- Navigate to Plugins > Add New.
- Click Upload Plugin and select the downloaded .zip file.
- Click Install Now, then activate the plugin once the installation is complete.
- Configure Main-GPT
Configuration
1. Set Up Pinecone (Vector Database)
- Go to Pinecone and create a free account.
- Set up a free vector database.
- Copy your API Key and save it for later.
2. Set up OpenAI
- Go to OpenAI and create an account.
- Generate your API Key and API Organization ID.
3. Configure Main-GPT in WordPress
- Navigate to Main AI > AiSettings in your WordPress dashboard.
- Enter your Pinecone API Key and database details.
- Enter your OpenAI API Key and Organization ID.
Training the AI Memory
Once Main-GPT is configured, you can start feeding data into the vector database.
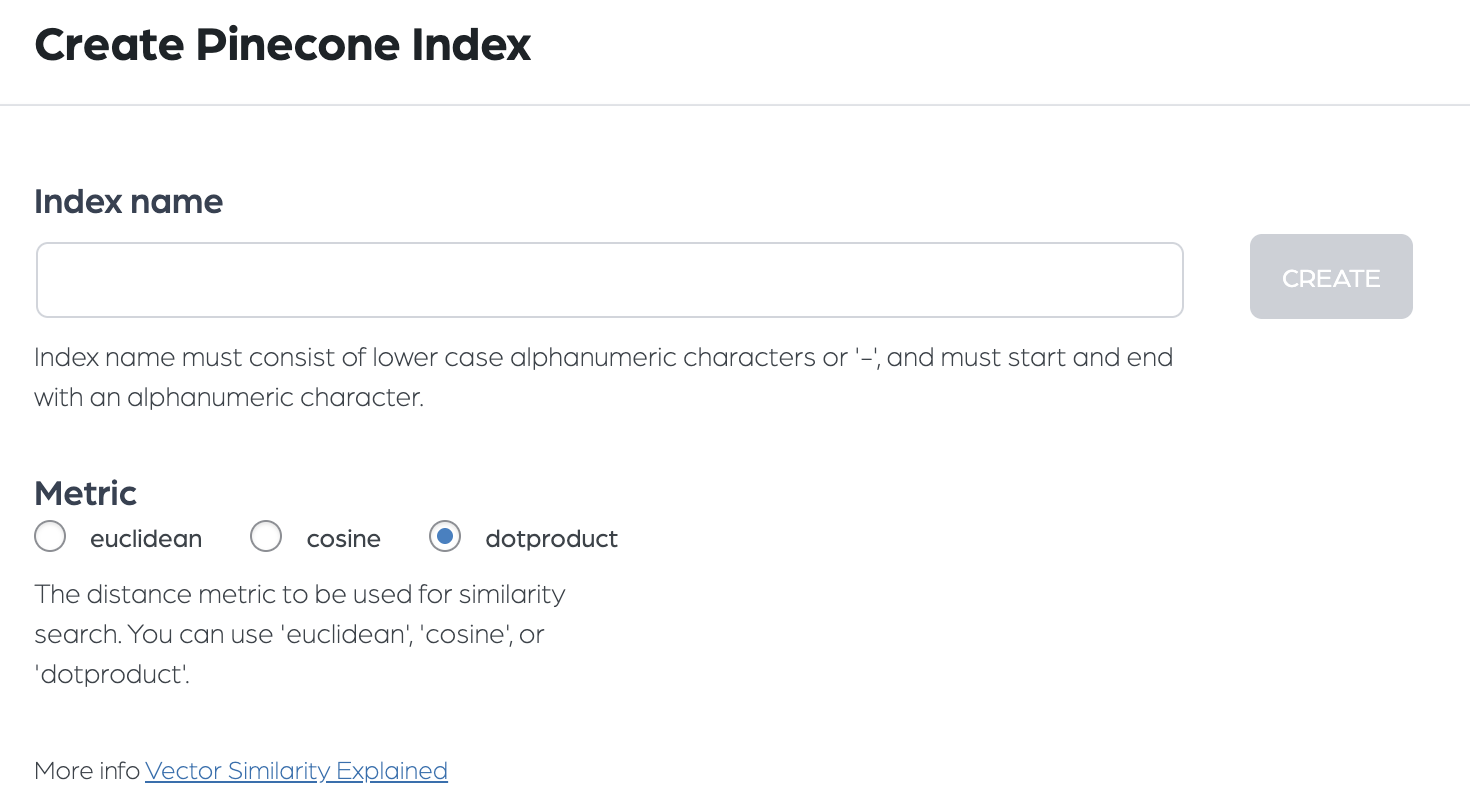
1. Create a new AI Memory
- Go to Main AI > AiMemory in the WordPress dashboard.
- Click Add New to create a new memory.
- Select an Index Name and choose a similarity metric:
- Euclidean
- Cosine
- Dot Product
2. Train the AI Memory
- Choose the content you want to index (posts, pages, WooCommerce products, etc.).
- Start training the AI by pressing the START TRAINING MEMORY button.
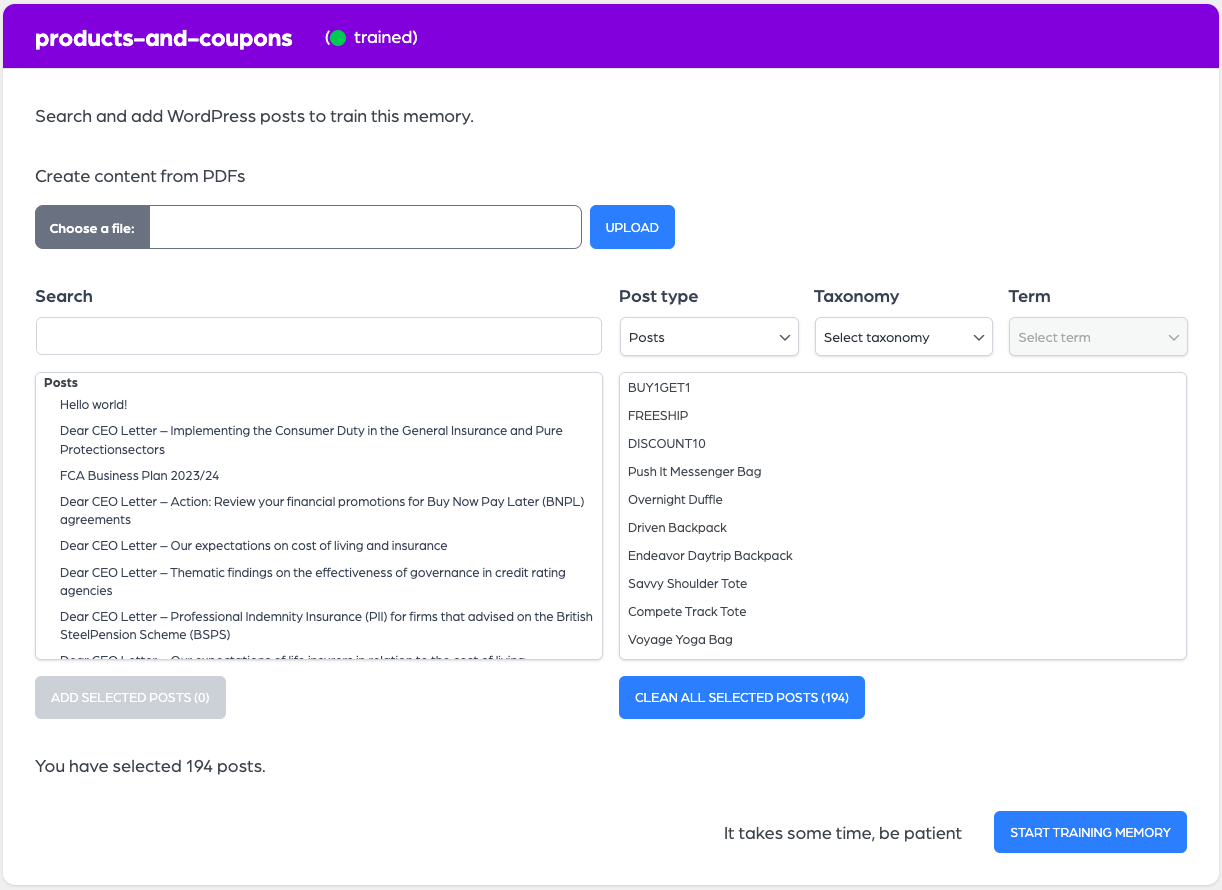
3. Publish the AI Memory
- Once the training is complete, don't forget to publish your AI Memory to make it active.
Setting up the AI Chatter
Once the AI Memory is trained, you can configure the chat to use your indexed data.
1. Create a new AI Chatter
- Go to MainAI > AiChatter in the WordPress dashboard.
- Click Add New to create a new chat.
- Give it a name and configure its settings.
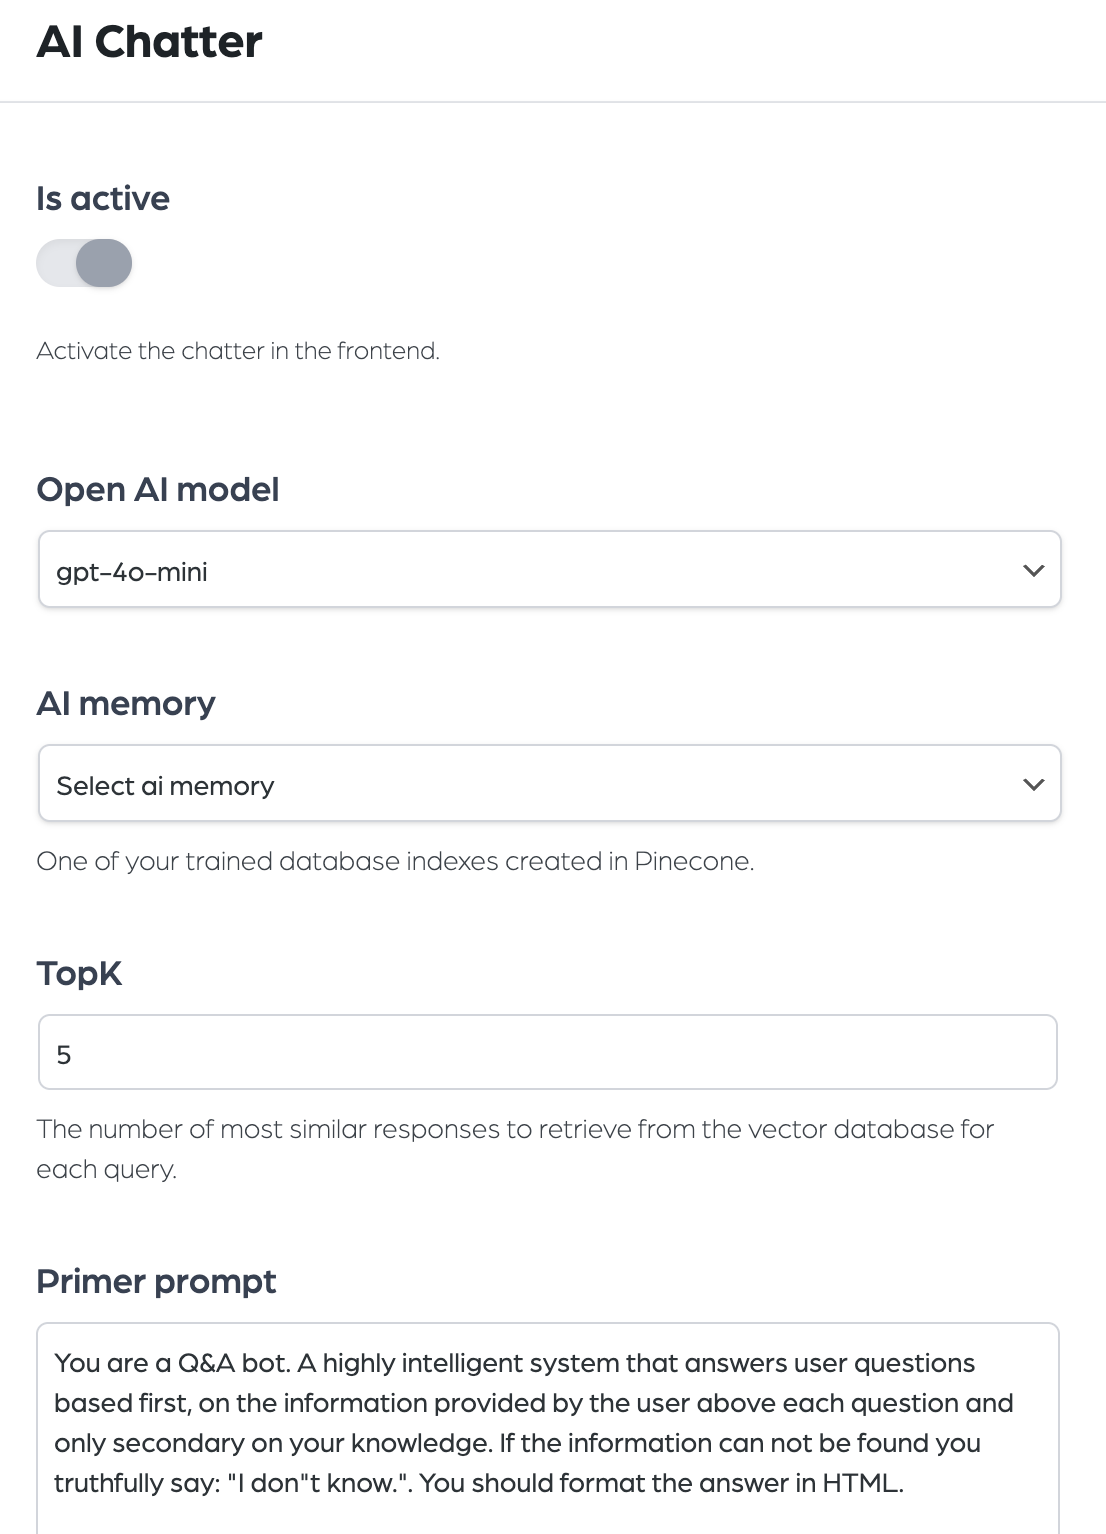
2. Configure AI Chatter Settings
- Select the AiMemory that the chat will use.
- Choose the OpenAI model (e.g.,
gpt-4,gpt-3.5). - Set the Top-K value (number of retrieved results from the vector database).
- Define the First Prompt (how the AI should behave).
- Set an Initial Message (default message when chat starts).
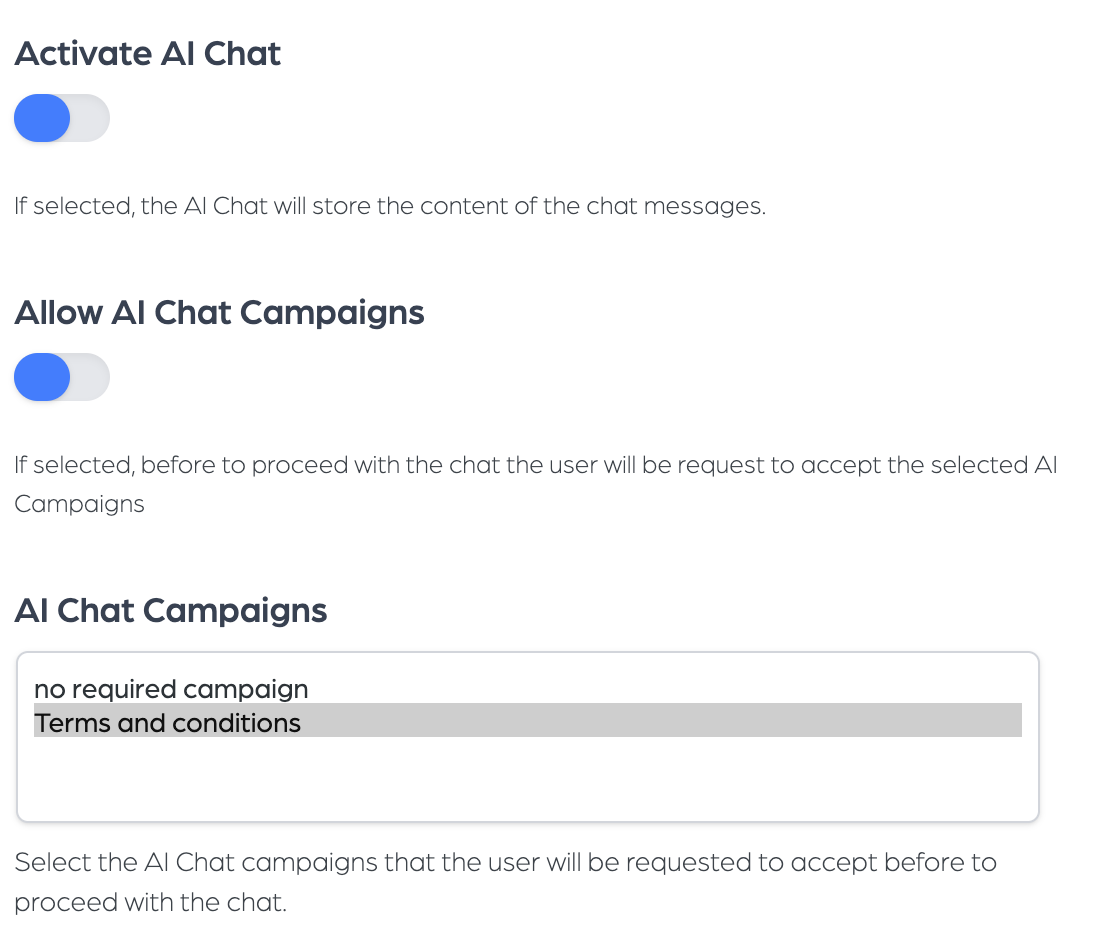
- Adjust other configurations as needed (campaigns, contacts, limits).
3. Publish and use the chat
- Publish the AI Chatter CPT to make it active.
- Copy the generated shortcode and paste it into any page or post where you want the chat to appear.

Setting up AI Campaign
If you want to show campaigns in each chat to your users, you can create and configure them under MainAI > AiCampaign.
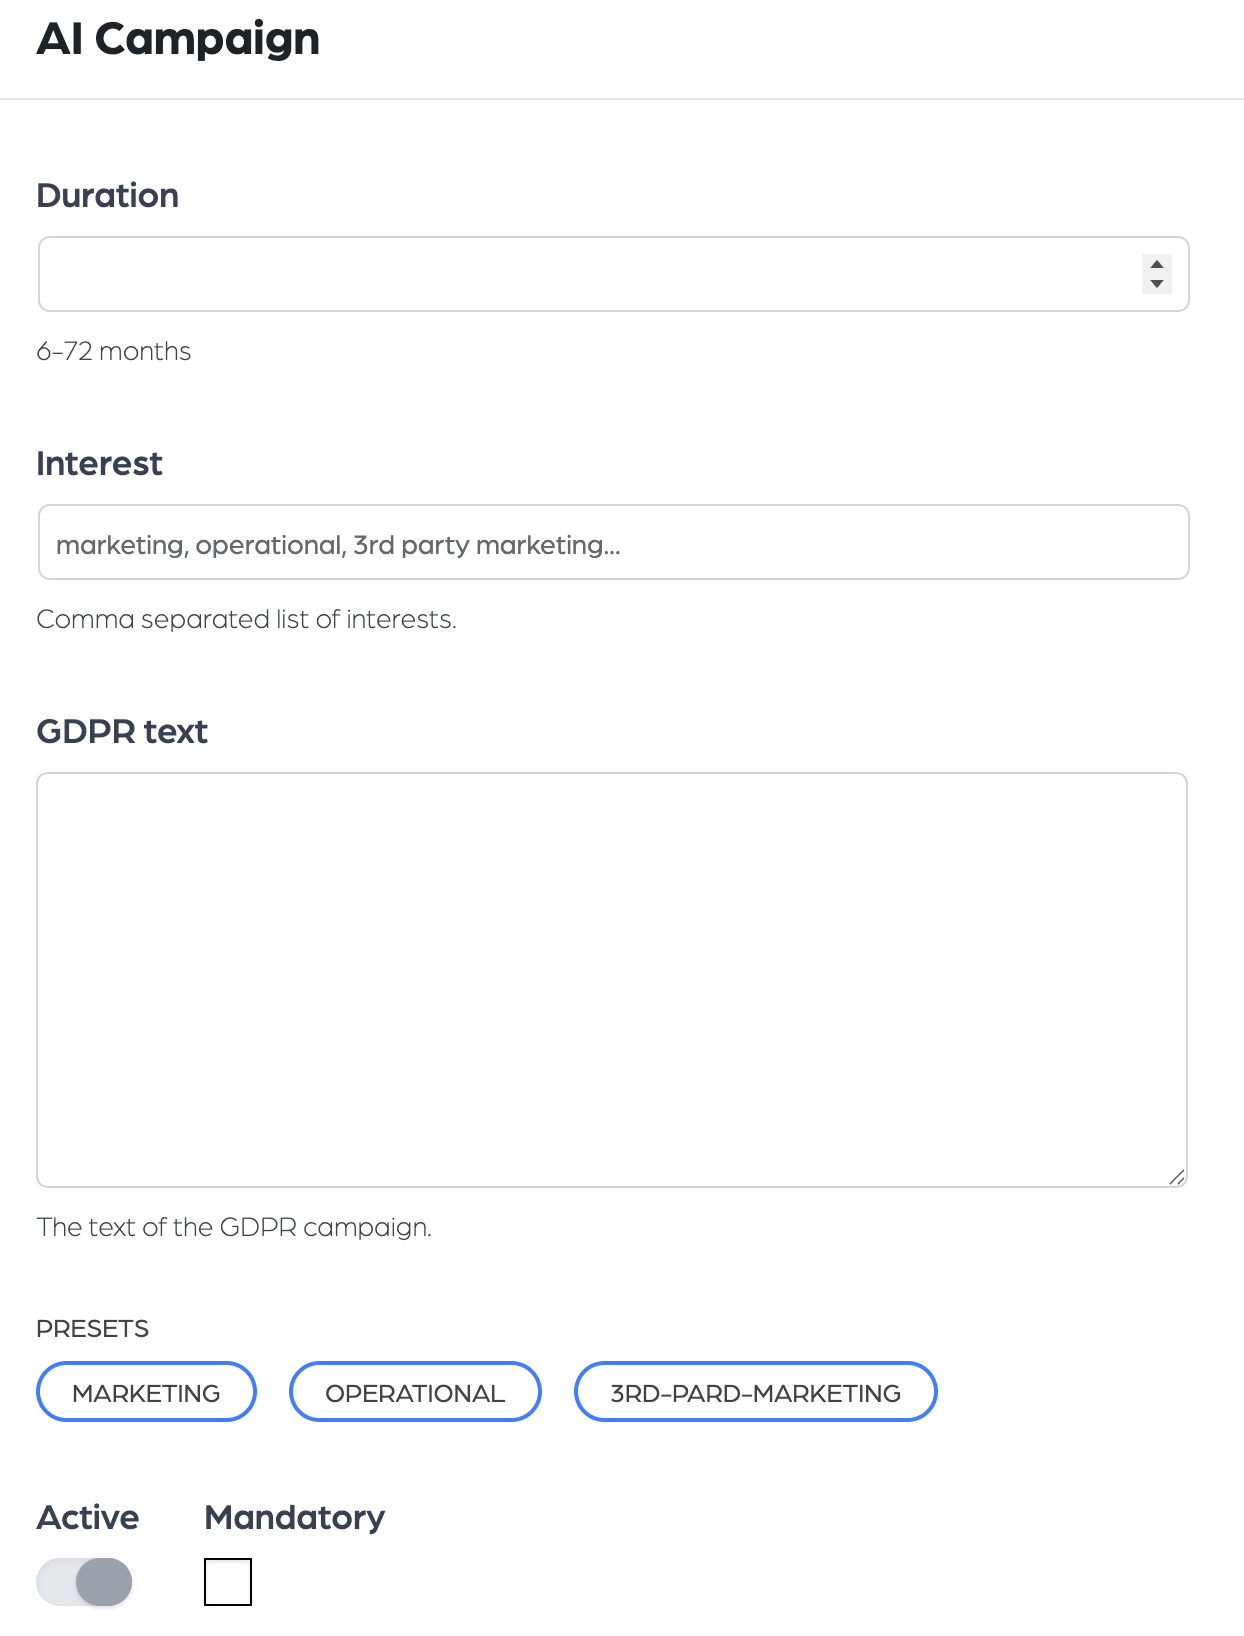
1. Create a new campaign
- Go to MainAI > AiCampaign in the WordPress dashboard.
- Click Add New to create a new campaign.
- Configure the campaign's content (what message or offer you want to show).
- Set the duration (months) for the campaign.
- Publish the campaign.
2. Link campaigns to AI Chat
- After creating the campaign, go back to AI Chatter.
- In the chat settings, select which AI Campaign will be shown to users during the chat.
Setting up AI Contacts
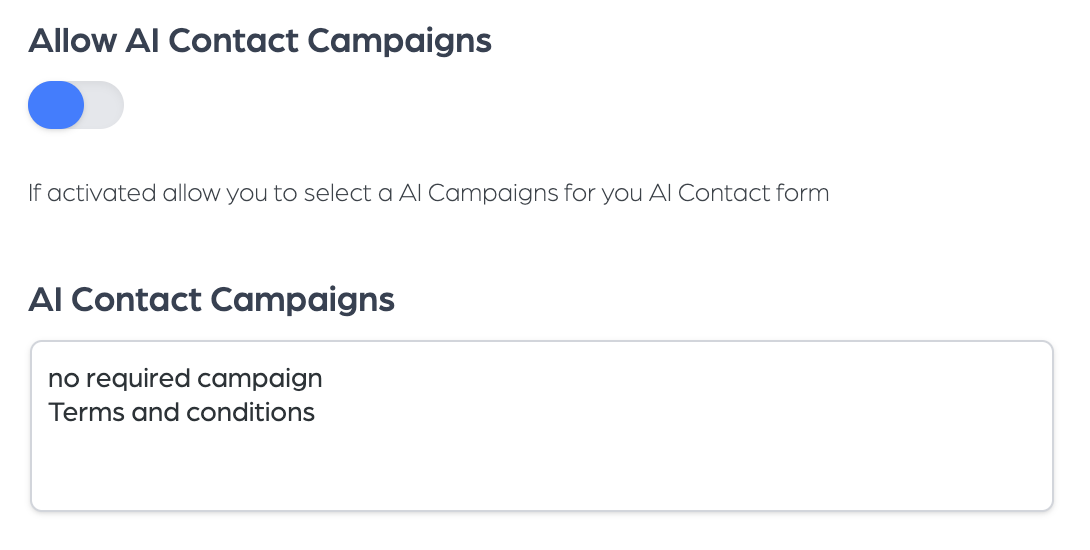
If you want to show a contact form in each chat to your users after some number of questions, you can create and configure it under MainAI > AiChatter.

Then, go to MainAI > AiContacts in the WordPress dashboard to check the contact information from the users who filled out the form.
Just like with the AI Chat campaigns, you can assign campaigns to the contact form.
Setting up AI Chat
To save every chat conversation, you need to activate the Save Chat option in the AI Chatter settings.

Go to MainAI > AiChat to check the chat history.